Home
Making a dibber

Any wood which is available and cheap can be used for the dibber. The blank should be 2 inches (50 mm) square and 13 inches (330 mm) long. |
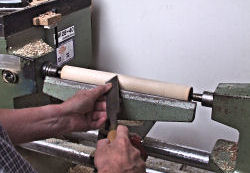 |
The blank is set-up between centres and roughed down in the usual way (see the Introduction to Woodturing). When the roughing down has been completed the section which will contain the beads and the handle is smoothed with a skew chisel. Only that area needs to be smoothed because the remainder will be subject to further turning. | |
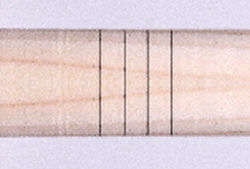 |
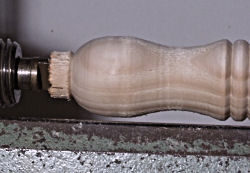
Mark the position of the beads with a pencil | |
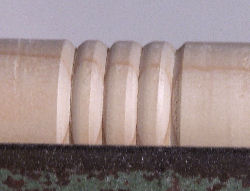 |
Make four small 'V' cuts on the pencil lines. Form the beads with either a skew chisel or a beading tool. A 3/8" (10 mm) square beading tool is ideal because the side of a bead can be cut simply by rotating the tool without having to slide it along the rest. | |
 |
Create some waste at each end of the work piece to allow for parting off. | |
 |
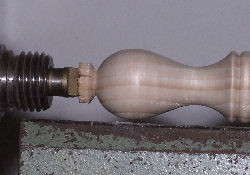
Start shaping the handle. It is preferable to gradually shape the whole of the handle rather than, say, forming the hollow first. If the hollow is formed first it may eventually be found difficult to obtain a nice shape to the handle. | |
 |
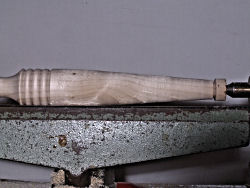
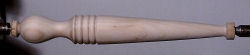
The finished handle | |
 |
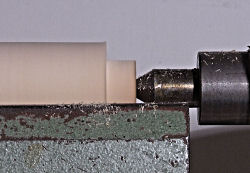
Begin to taper the pointed end with a roughing gouge. Work from the larger diameter to the smaller. | |
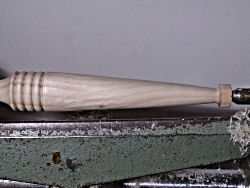 |
Smooth the pointed end with a skew chisel. To do this move the rest so that it is parallel with the taper when looked at from above. Because the top of the rest cannot be made parallel to the slope you will have to raise the handle of the skew as you make the cut. | |
 |
The finished dibber sanded and finished ready for parting off. The best tool for parting off is not a parting tool but a chisel. Cut away as much material as you dare at the tailstock end and then do the same thing at the headstock end. Take the dibber from the lathe, cut the waste off with a saw, and then sand the rough area. |